Transfers Between Aurora/NEAR
Now let’s get down to the most fascinating part of this manual—transferring assets. Let’s start with a transfer between Aurora and NEAR networks and move Aurora tokens between them.
- Select NEAR as the “From” network, and Aurora as the “To” network. “Connect” both wallets, and click “Continue”.
tip
If you have trouble connecting networks, please refer to the Bridge Overview section.
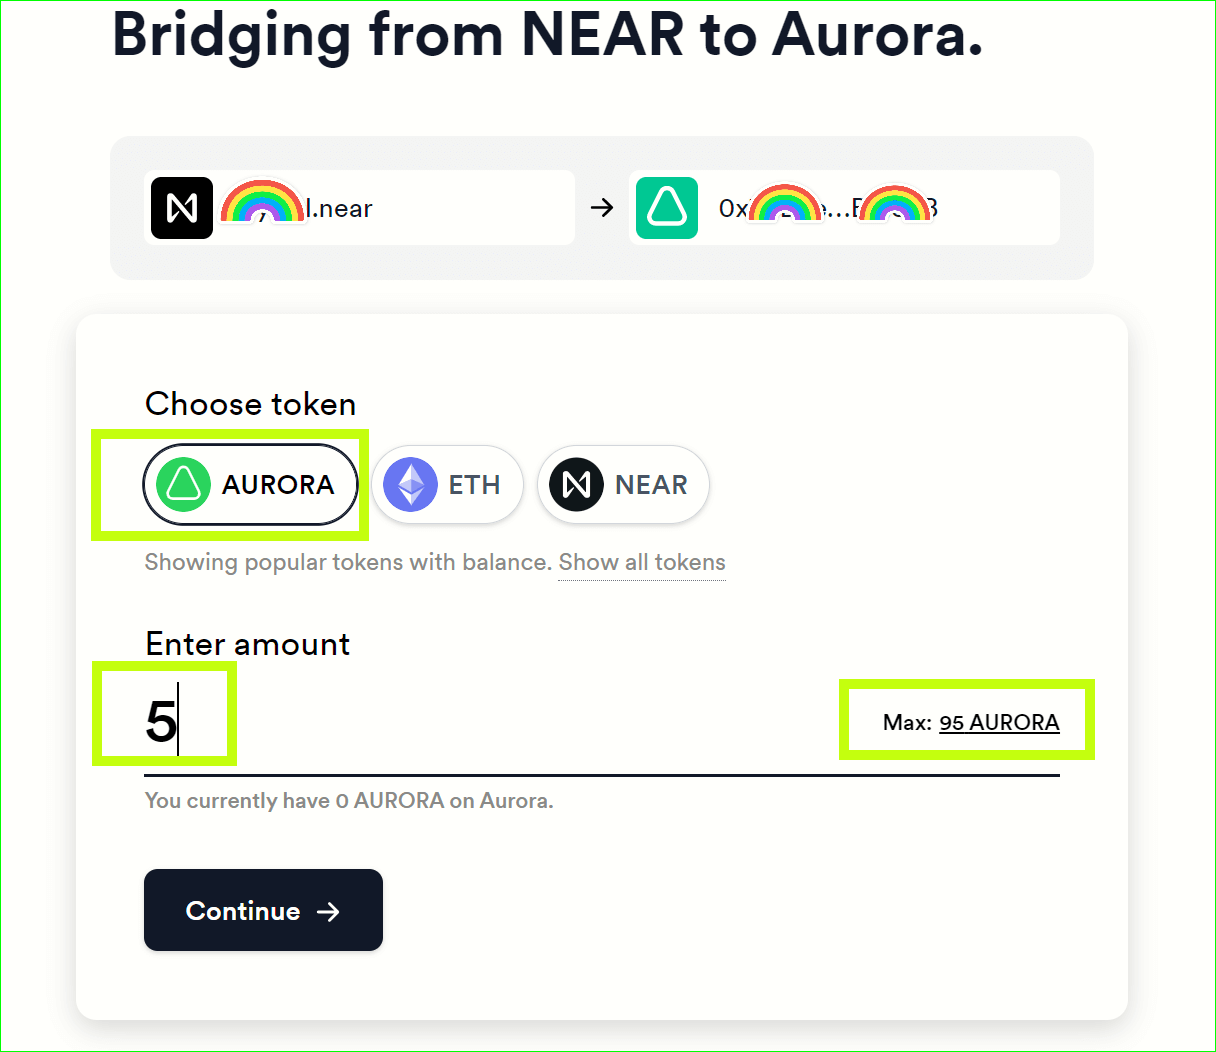
- Choose the “Aurora” token to send, and enter the amount you want to transfer. Click “Continue”. We show token balance on the destination network, as this is often useful in calculating how much needs to be transferred.
We also provide a one-click helper to allow you to send the full token balance in the transfer.
...and in the case that you’ve chosen ETH, we show you a warning that you may want to keep a bit around for gas fees!
tip
If you are wondering why you only see specific tokens, please refer to the Transfer Overview chapter for more information.

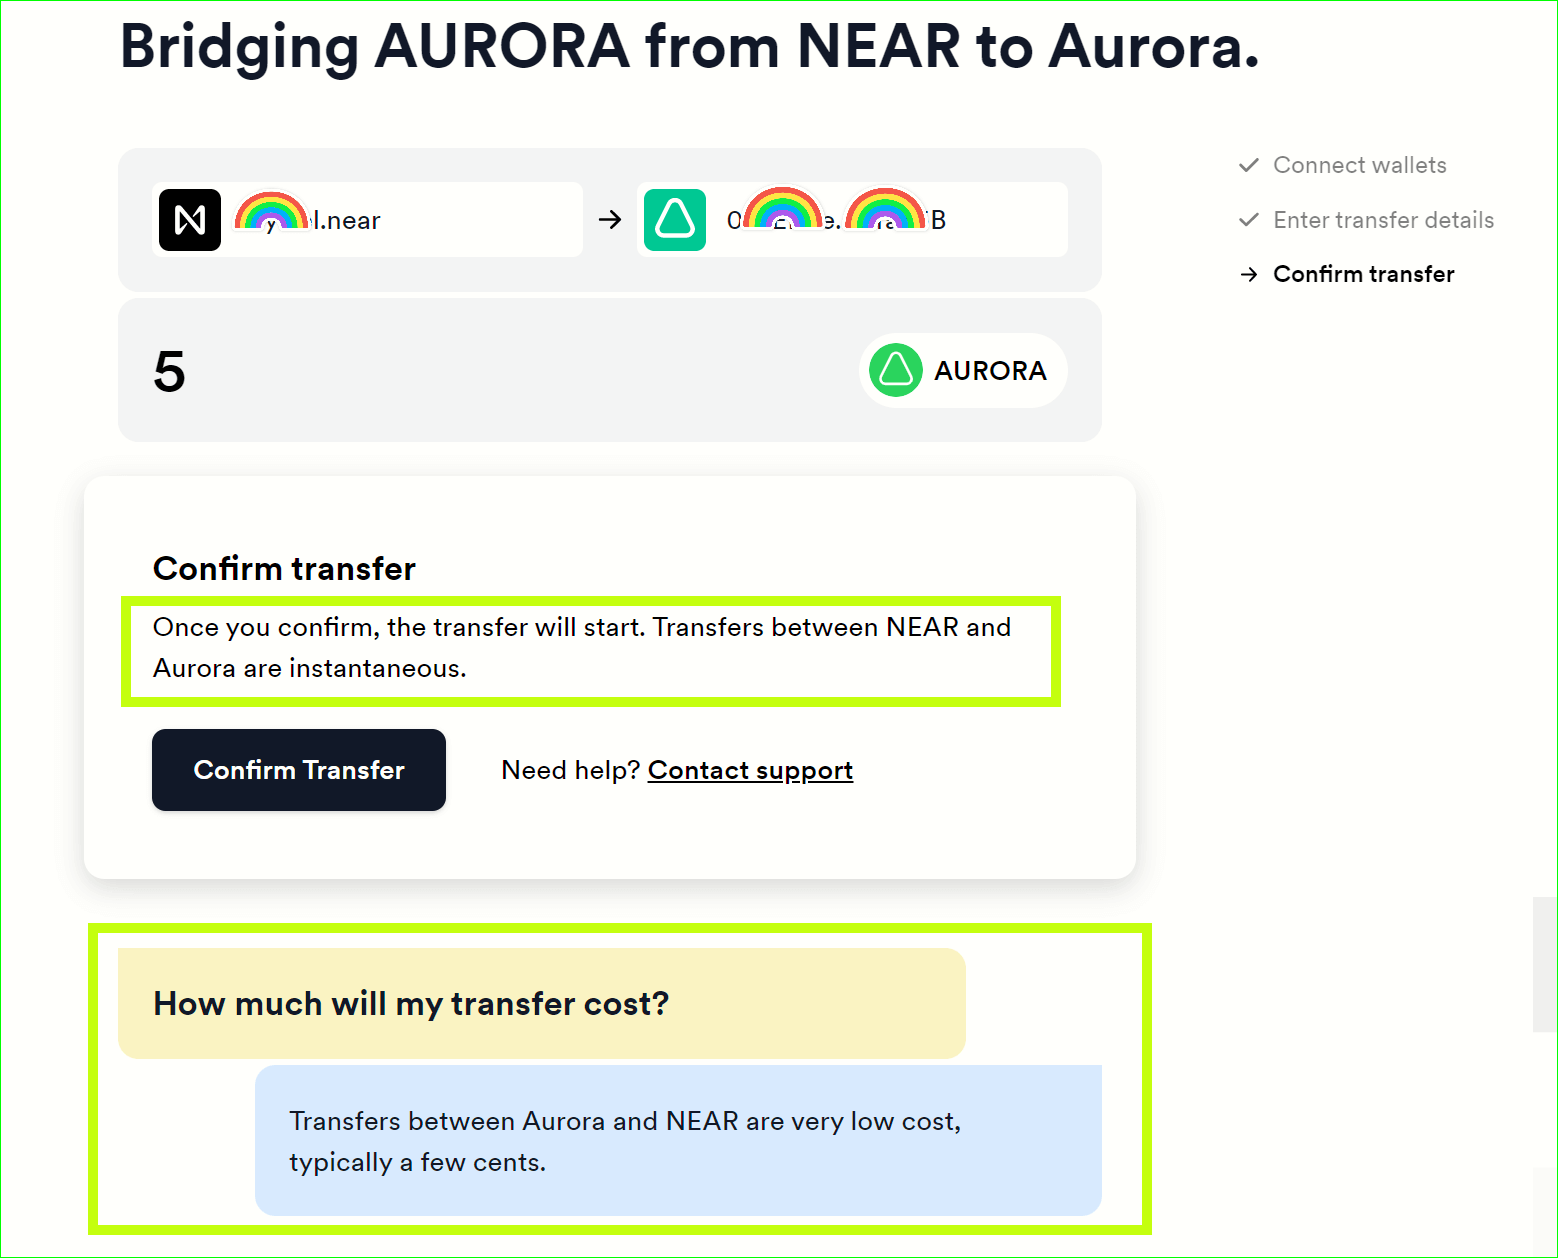
- On the next screen, check the transfer details, and click “Confirm Transfer”.

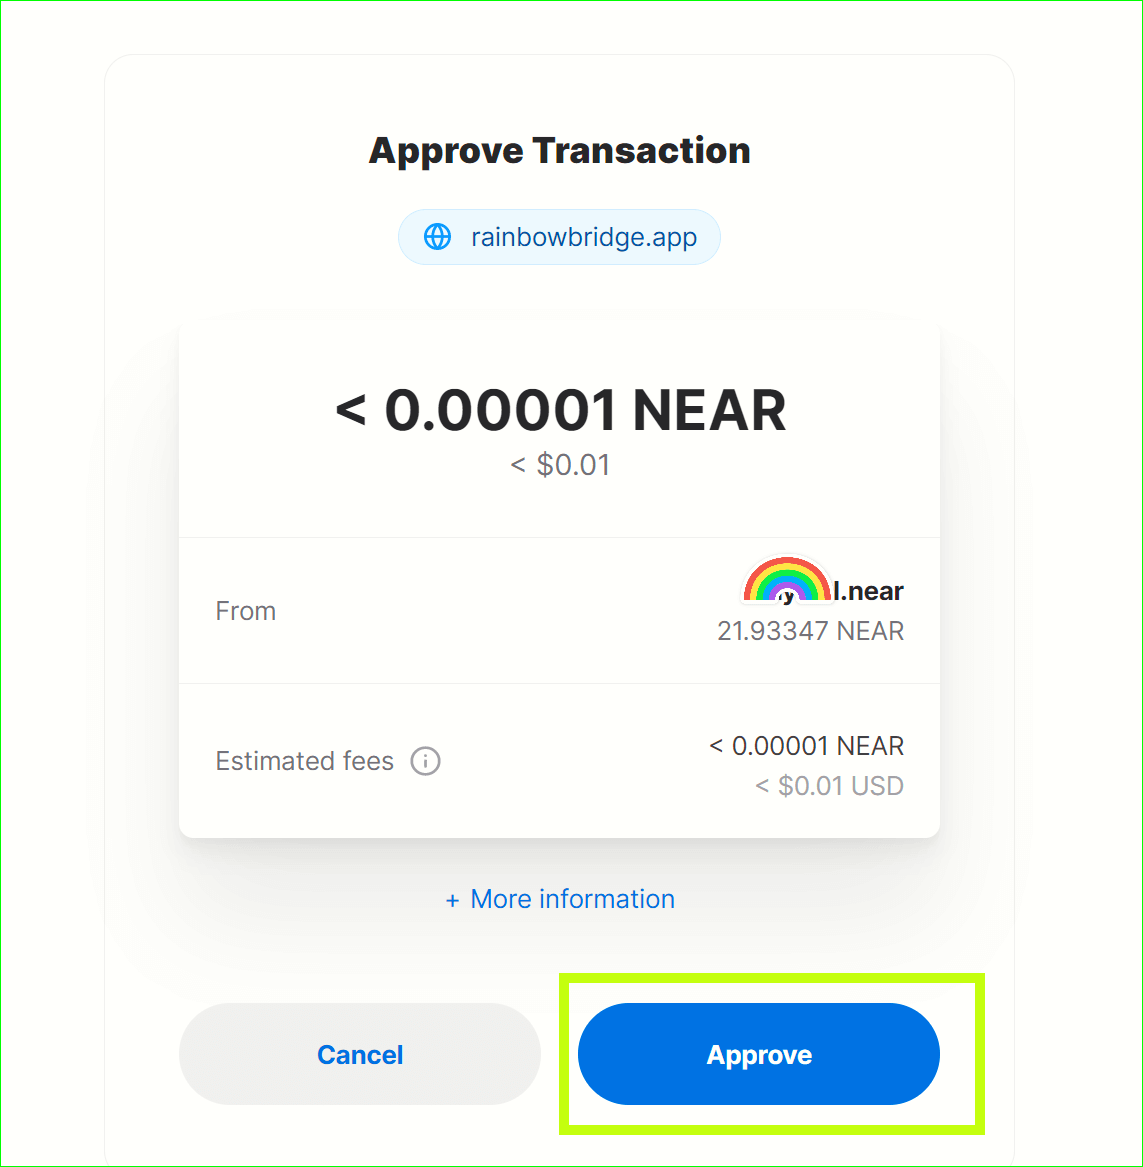
- At this point, you'll be redirected to your NEAR wallet for authorization, which you should approve.

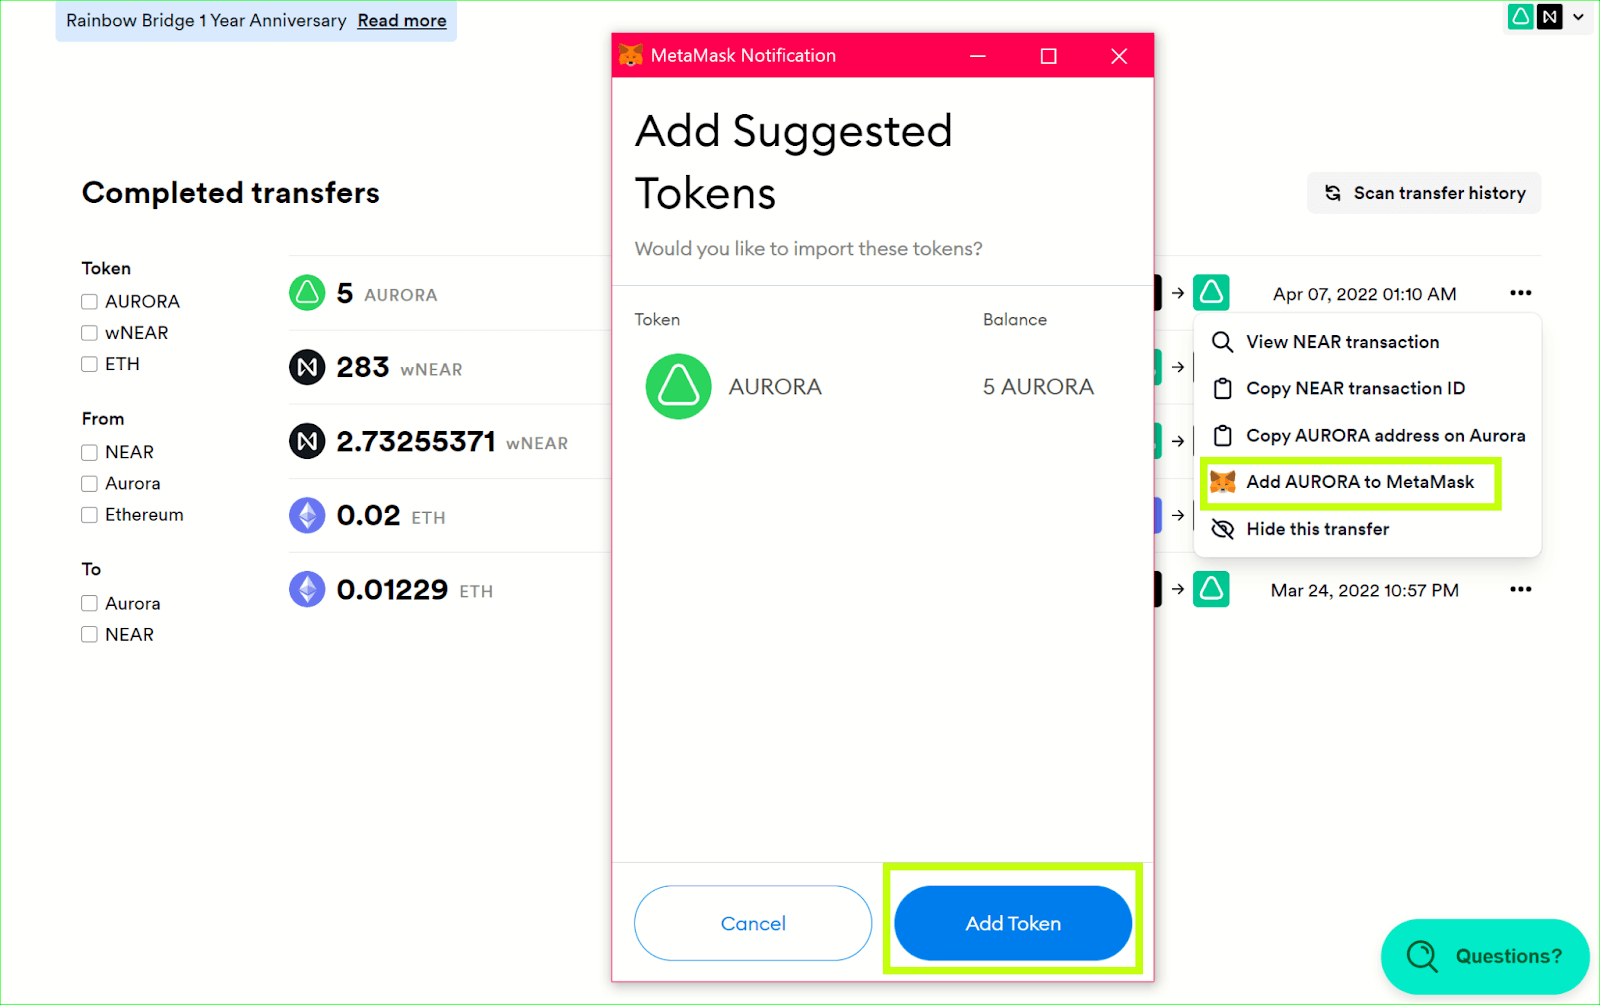
- After approving the transfer in your NEAR wallet, you'll be redirected to the Rainbow Bridge, and your transfer will succeed almost immediately. You'll see your completed transfer in the Completed Transfers list.

note
Since sometimes tokens are moved to a non-native network (e.g. if you move NEAR tokens from NEAR to Aurora network), they get wrapped (e.g. wNEAR), so you should add the wNEAR token address to your wallet in order to see the tokens transferred.
To do this, click the three dots on the right, and “Add NEAR to MetaMask” (the respective token name will be prompted by the bridge). Once the NEAR token has been added to MetaMask, you can click the “Assets” tab in MetaMask, and see the NEAR tokens you sent from Near to Aurora.
The screenshot below is for illustrative purposes and does not reflect the example with NEAR above.
